If you are looking to channel the high-energy, futuristic aesthetic of the early 2000s, look no further than these Y2K press on nails. This specific design captures the essence of the “Cyber-Bimbo” and “McBling” eras, blending hyper-feminine hot pinks with industrial liquid metallics. We are going to walk through how to create a professional-grade set of long coffin nails featuring a seamless airbrush gradient and 3D accents right from your home vanity.
The beauty of the Y2K press on nails trend lies in its unapologetic maximalism. Think back to the days of bedazzled flip phones and metallic tracksuits; that same energy is condensed into this high-gloss, multi-dimensional manicure. By using modern gel technology, we can achieve a look that is far more durable and “glassy” than the original acrylics of two decades ago.

Why These Y2K Press On Nails Are the Ultimate Aesthetic Statement
- The Iconic Coffin Silhouette: The long coffin shape provides the perfect expansive canvas for complex gradients and 3D silver star charms.
- Seamless Airbrush Gradient: We achieve a soft-focus transition from hot pink to pale blush, mimicking the classic airbrush machines of the late 90s.
- Liquid Silver Chrome Swirls: Hand-painted metallic elements provide a molten, futuristic contrast to the vibrant pink base.
- Textural 3D Elements: The combination of small pink rhinestones and silver stars creates a tactile, high-fashion finish that catches the light from every angle.
The Professional Kit: Everything You Need for Y2K Press On Nails
To achieve this specific look, you need a mix of high-pigment gel polishes and precise structural components. Each “ingredient” in this beauty recipe serves a functional purpose in ensuring both aesthetic accuracy and long-lasting wear.
Long Coffin Nail Tips (Full Cover): You will need 10 (or a full set of 24 for sizing) high-quality clear tips. These provide the structural foundation for your Y2K press on nails, offering the length and taper required for the coffin shape.
Dehydrator and Primer 0.5 oz (15ml): These “foundational chemicals” are essential for longevity. They remove natural oils from your nail plate, ensuring the press-ons bond securely for up to 3 weeks.
Hot Pink and Pastel Pink Gel Polish 0.5 oz (15ml) each: These two shades are layered to create the signature airbrush gradient. Use high-viscosity gels to ensure the pigment remains saturated even when thinned out for blending.
Silver Chrome Painting Gel 0.17 oz (5g): This is a highly pigmented, non-wipe gel used for the liquid silver chrome swirls. Unlike chrome powder, the painting gel allows for precise, raised “molten” lines.
3D Silver Star Charms (Pack of 10): These metallic alloy charms are the centerpiece of the design. They should be approximately 0.15 inches (4mm) in diameter to fit comfortably on the nail surface.
Small Pink Rhinestones (SS6 size): These tiny gems add “sparkle-per-square-inch.” We recommend using glass rhinestones rather than plastic for a much higher refractive index and shine.
Strong Nail Glue or UV Solid Glue 0.25 oz (7g): To secure your Y2K press on nails, a professional-grade cyanoacrylate glue or a modern UV-curable solid gel is required for a gap-free bond.
High-Gloss No-Wipe Top Coat 0.5 oz (15ml): This is the final “glaze” that seals the design. It must be ultra-shiny to achieve the “glassy” reflections seen in our visual blueprint.
The Essential Tools for High-Detail Nail Artistry
To replicate the fine metallic swirls and the gradient, you cannot rely on the polish brush alone. You will need a specific set of tools to handle the “culinary” precision of this design.
- Mini LED/UV Lamp (36W minimum): For “flash-curing” charms in place and fully setting the gel layers.
- Ombré Sponge or Cordless Airbrush: To create the soft pink gradient transition.
- Fine Detail Liner Brush (7mm or 9mm): Essential for mapping out the liquid silver chrome swirls.
- Wax Rhinestone Picker: For the precise placement of the silver stars and pink rhinestones.
- 100/180 Grit Nail File: For etching the inside of the press-on and shaping the natural nail.
The Masterclass: Applying Your Y2K Press On Nails
Creating this look is a multi-stage process that requires patience and an eye for symmetry. Follow these steps to ensure your DIY set looks exactly like a $150 salon application.
Phase 1: Preparing the Canvas for Maximum Adhesion
Start by pushing back your cuticles and gently buffing the surface of your natural nails. Wipe each nail with a lint-free pad soaked in 91% Isopropyl Alcohol (30ml) to remove any lingering dust or oils. Apply one thin coat of dehydrator, followed by a layer of primer; this creates the “sticky” surface necessary for the Y2K press on nails to remain secure during daily activities like typing or crafting homemade treats.
Phase 2: Creating the Airbrush Gradient Base
On your clear coffin tips, apply a thin layer of the lighter pink gel. While wet (or using a sponge for a dry-cure method), dapple the hot pink gel starting from the tips and working toward the middle. Use a soft dabbing motion to blur the line where the two colors meet. Look for a “mist-like” visual cue; there should be no harsh lines, only a smooth transition of color. Cure in the lamp for 60 seconds.

Phase 3: Painting the Liquid Silver Chrome Swirls
Using your fine liner brush and the silver painting gel, draw fluid, organic “S” curves across the nail. These should look like molten metal floating on the surface. For the most authentic Y2K press on nails look, ensure the swirls overlap slightly with the gradient. If the gel is “self-leveling,” wait 5 seconds before curing to let the silver lines round out and look like real liquid mercury. Cure for 30 seconds.
Phase 4: Setting the 3D Star Charms and Rhinestones
Apply a small bead of rhinestone glue or thick base gel where you want your 3D silver star charms to sit. Press the star firmly into the gel using your wax picker. Surround the star with 2-3 small pink rhinestones to create a “cluster” effect. Flash-cure for 10 seconds to freeze them in place, then repeat for all ten nails. Once all charms are placed, do a full 60-second cure to lock the “jewelry” onto the nail.
Phase 5: The Glassy Top Coat Finish
Apply a generous layer of high-gloss top coat over the entire nail, including the swirls. Use the brush to carefully seal around the edges of the stars and rhinestones—but do not cover the top of the crystals, as this will dull their facets. The final visual cue is a “mirror-like” reflection on the surface of the nail. Perform a final cure of 90 seconds to ensure the top coat is completely “hardened” and smudge-proof.
Expert Tips for a Flawless Y2K Finish
- Etch the Interior: Use your file to gently roughen the inside of the press-on nail where it meets your natural nail. This creates more surface area for the glue to “grab.”
- Mind the Cuticle Gap: When applying the Y2K press on nails, leave a hair-thin gap between the press-on and your skin. This prevents lifting as your natural nail grows.
- Seal the Free Edge: Always run your top coat brush along the very tip (the free edge) of the coffin nail to prevent the chrome from chipping.
- Symmetry is Key: Ensure your star charms are placed in varying positions on each finger to keep the design dynamic and “hand-crafted.”
Maintenance, Removal, and Reuse
With proper care, these nails will last 2-3 weeks. To maintain the shine, wipe the surface with an alcohol pad every few days to remove lotions or oils. If a star charm feels loose, a tiny drop of brush-on glue at the base will reinforce it.
When you are ready for a change—perhaps to match a festive holiday look—do not rip them off! Soak your hands in warm water mixed with olive oil and soap for 15 minutes. Gently use an orange wood stick to lift the edges. If you used adhesive tabs instead of glue, these Y2K press on nails can be cleaned with alcohol and reused for your next event.
What to Style With Your Y2K Press On Nails
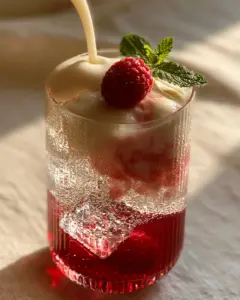
These nails are a bold accessory that deserves a cohesive look. Pair them with glossy lips and frosted eyeshadow to fully lean into the millennium aesthetic. If you’re hosting a themed party, consider serving vibrant snacks like dragon fruit lemonade or colorful birthday cake pops to match the hot pink gradient of your manicure.
Frequently Asked Questions
Yes! If you remove them carefully using warm water and oil rather than acetone, and use adhesive tabs instead of glue, you can wear these Y2K press on nails multiple times.
While a machine provides the smoothest finish, you can achieve a very similar effect using a makeup sponge or a specialized nail ombré sponge with gel polish.
When applied with professional-grade glue and proper nail preparation (dehydrating and priming), a high-quality set of press-on nails can last between 2 to 3 weeks.
Use a specialized silver painting gel rather than chrome powder. Painting gels are non-wipe and highly viscous, allowing you to create the raised, ‘molten’ texture seen in Y2K designs.
Not if you use a dedicated rhinestone glue or a thick builder gel to ‘seat’ the charm. Ensuring you seal the edges with a top coat also provides extra security.
The Blueprint for Perfect Y2K Press On Nails

Y2K Press On Nails: The Ultimate DIY Guide to Pink Chrome Coffin Glamour
Ingredients
Equipment
Method
- Clean natural nails with alcohol, apply dehydrator and primer to ensure the Y2K press on nails bond correctly.
- Sponge hot pink gel onto the tips of the pastel pink base to create a seamless airbrush-style gradient. Cure for 60 seconds.
- Use a liner brush to paint liquid silver chrome swirls over the gradient. Cure for 30 seconds.
- Apply 3D silver stars and pink rhinestones using charm glue. Flash-cure to hold, then full cure for 60 seconds.
- Apply a thick layer of glossy top coat around charms and over the polish for a glassy finish. Cure for 90 seconds.
Notes
Double-cure the thumbs to ensure the side-walls are fully set.
Join the Y2K Beauty Community!
We hope this guide helps you achieve the nostalgic, high-glam manicure of your dreams. These Y2K press on nails are more than just a trend; they are a celebration of bold self-expression and futuristic art. If you tried this design, let us know in the comments below! Don’t forget to follow us on Pinterest for more DIY beauty “recipes” and aesthetic inspiration. Share your results and tag us—we love seeing your coffin-shaped masterpieces!