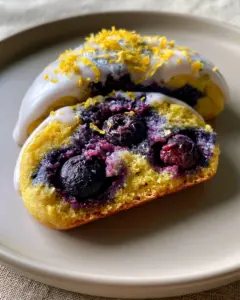
There is a specific kind of magic found in the intersection of high-end artistry and culinary indulgence. The caramel balayage is no longer just the gold standard for luxury hair; it has become the ultimate inspiration for a dessert that defines modern elegance. Imagine a deep, dark chocolate foundation that transitions seamlessly into ribbons of warm honey and golden caramel, mimicking the perfect “color melt” of a salon masterpiece.
This recipe captures the exact visual essence of a caramel balayage, utilizing professional baking techniques to achieve that “lived-in” wavy texture and ultra-glossy finish. We aren’t just baking a cake; we are painting a flavor profile that looks as healthy and vibrant as it tastes. Whether you are hosting a sophisticated gala or simply want a show-stopping centerpiece, this dessert delivers a multi-dimensional aesthetic that is virtually indistinguishable from a professional hair transformation.
In the world of food photography and modern styling, the caramel balayage effect is achieved through a “shadow root” technique using high-fat Dutch-processed cocoa and a hand-painted highlight system of fleur de sel caramel. The result is a seamless gradient that flows from the mid-lengths of the cake to the edges, ensuring there are no harsh lines—just pure, cascading sweetness. If you have mastered our brown butter espresso brownies, you will find this transition into complex layering both intuitive and rewarding.

The Aesthetic Allure of the Caramel Balayage Dessert
- Visual Depth: A rich, deep dark chocolate brown base provides a high-contrast foundation for the lighter tones.
- Hand-Painted Precision: Warm honey and caramel highlights are meticulously blended to ensure zero “brassy” orange tones in the sugar work.
- Textural Movement: Styled with soft, lived-in “beach waves” in the frosting to create a realistic, dimensional look.
- The Gloss Factor: A healthy, ultra-glossy finish that reflects natural light, just like a fresh salon glaze.
- Seamless Integration: A shadow root melt technique ensures the chocolate and caramel are perfectly married without losing their individual identities.
The Decadent Palette: Essential Ingredients for the Melt
Dutch-Processed Dark Cocoa Powder: 1.5 cups (150g). This is the secret to the “shadow root” effect, providing the deep, almost-black chocolate base that anchors the caramel balayage look.
Manuka or Wildflower Honey: 1/2 cup (120ml). Honey provides the warm, golden “highlights” and creates a more complex sweetness than white sugar alone.
Heavy Cream (36% Fat): 1 cup (240ml). Essential for the caramel sauce and the “glossy” finish, the fat content ensures the “waves” hold their shape while remaining soft.
Unsalted European-Style Butter: 1 cup (225g). Higher fat content than standard butter helps achieve that “healthy hair texture” sheen in the frosting.
Fleur de Sel: 1 tsp (6g). This prevents the caramel from becoming cloying and adds a sophisticated edge to the warm highlights.
Espresso Powder: 1 tbsp (5g). In the culinary world, espresso acts as a toner, deepening the chocolate base and removing any unwanted reddish hues.
All-Purpose Flour: 2.5 cups (300g). Provides the structure needed to support the heavy “waves” of caramel and chocolate without collapsing.
Whole Milk: 1 cup (240ml). Room temperature milk ensures the batter stays hydrated and the “lived-in” crumb remains moist for days.
Precision Tools for Artistic Baking
To achieve a professional caramel balayage aesthetic, you will need a few specialized tools. An offset spatula is non-negotiable for creating those “beach waves” in the frosting. You will also need a silicone pastry brush to “hand-paint” the honey highlights onto the chocolate surface. A high-quality candy thermometer is vital for the caramel, as the temperature dictates the final “gloss” and transparency of the highlights. Finally, a rotating cake stand will allow you to apply the “shadow root” melt with a seamless, 360-degree consistency.
The Art of the Shadow Root: Creating the Base
Achieving the Deep Dark Chocolate Foundation
Start by sifting your Dutch-processed cocoa and espresso powder together. This combination creates the “shadow root” depth. Cream your room-temperature butter and sugar until the mixture is light, then slowly incorporate the cocoa. You are looking for a visual cue of “wet mahogany”—a color that is rich, dark, and void of any chalkiness.
Mixing the Seamless Batter
Alternate adding your dry ingredients and your milk to the chocolate base. This ensures a “seamless” crumb. As you fold the batter, look for a “glossy” sheen to appear. This indicates the fats are properly emulsified, which is the culinary equivalent of a healthy hair cuticle. If you enjoy the process of building textures, you might also find inspiration in our peanut-butter brownie recipe for similar layering techniques.

Hand-Painting the Caramel Highlights
Developing the Warm Honey Tones
In a heavy-bottomed saucepan, melt your sugar and honey together. As the mixture boils, watch the visual changes carefully. You want a “warm honey” hue—think of a sun-drenched field in late August. Once it hits 240°F (115°C), whisk in your heavy cream. The color should instantly transform into a “creamy caramel” that looks soft and blendable.
The Balayage Application Technique
Once your cake is baked and cooled, apply the dark chocolate frosting primarily at the top (the “root”) and the very bottom. Using your offset spatula, leave the “mid-lengths” slightly thinner. This is where you will “hand-paint” your caramel. Use a spoon to drizzle the caramel in vertical ribbons, then use the pastry brush to softly blend the edges where the chocolate meets the gold. The goal is “zero harsh lines.”
Sculpting the Soft Lived-In Beach Waves
The final step in the caramel balayage look is the texture. Using the tip of your offset spatula, create “S” shaped motions through the frosting. This mimics the “soft lived-in beach waves” described in professional styling. Ensure the caramel highlights follow the curves of these waves, catching the light in the “valleys” of the frosting. This creates a three-dimensional depth that makes the cake look dynamic and “airy.”
Expert Tips for a Glossy Finish
- Temperature Control: Ensure your caramel is slightly warm when painting; if it’s too cold, it will sit on top of the frosting rather than “melting” into it.
- Avoid Brassiness: If your caramel looks too orange, a tiny pinch of extra espresso powder can “tone” the color back to a cooler, honey-brown.
- Lighting Matters: Display your caramel balayage cake in soft, diffused natural daylight to showcase the multidimensional layers.
- The Crumb Coat: Always perform a crumb coat to ensure no “flyaway” cake pieces interrupt the glossy finish of your final layers.
- Hydration is Key: For a “healthy texture,” do not overbake. Use a toothpick and pull the cake when it has a few moist crumbs still attached.
Preserving Your Masterpiece
This cake is best stored at room temperature for the first 24 hours to maintain the “glossy healthy hair texture.” If you must refrigerate, place it in an airtight container to prevent the chocolate from “dulling.” To reheat a slice, 10 seconds in the microwave will “reactivate” the honey highlights, making them look fresh-from-the-salon. This level of care is similar to how you would treat an einschulungskuchen to ensure it stays perfect for the big day.
What to Serve with a Caramel Balayage Cake
To complement the rich, dark chocolate and warm caramel, consider pairings that offer a refreshing contrast. A crisp holiday margarita provides a citrusy brightness that cuts through the density of the fudge. If you prefer a non-alcoholic pairing, a glass of cold milk or a strong espresso is a classic choice. For a summer gathering, this cake looks stunning alongside a strawberry rhubarb pie, creating a beautiful “sweet table” spread with varied color palettes.
Frequently Asked Questions
Yes! By using high-fat European butter and finishing the cake with a warm honey-caramel drizzle, you can achieve a healthy, ultra-glossy sheen that mimics a salon glaze.
To keep highlights warm but not orange, use honey as a base and add a tiny pinch of espresso powder or extra salt to tone down the brightness of the sugar.
Use an offset spatula to create gentle ‘S’ motions through the frosting. Ensure the frosting is soft and at room temperature to allow for fluid movement.
While it looks complex, the hand-painted nature is very forgiving. Unlike precise piping, this style celebrates a ‘lived-in,’ natural look that hides minor imperfections.
The secret is the ‘shadow root’ technique—using a very dark chocolate frosting at the base and blending it into the lighter caramel mid-lengths using an offset spatula to ensure no harsh lines.
The Ultimate Caramel Balayage Recipe Card

Caramel Balayage Dark Chocolate Marble Cake with Honey-Glow Highlights
Ingredients
Equipment
Method
- Mix Dutch cocoa and espresso into the butter mixture to create a deep dark chocolate brown base.
- Bake at 350°F (175°C) for 35 minutes until the texture is moist and healthy.
- Using a pastry brush, hand-paint warm honey-caramel ribbons over the mid-lengths of the cake.
- Use an offset spatula to sculpt soft lived-in beach waves into the glossy frosting.
Notes
Apply caramel while slightly warm for the best glossy finish.

Closing & Call to Action
Creating a caramel balayage in the kitchen is an exercise in both patience and artistic expression. By focusing on the “shadow root” chocolate base and the meticulously blended honey highlights, you produce a dessert that is as visually stunning as it is delicious. We would love to see your “lived-in waves” and glossy results! Share your creations on social media and be sure to follow us on Pinterest for more visually-inspired culinary blueprints. Don’t forget to check out our no-bake chocolate peanut butter dessert for more chocolatey inspiration!