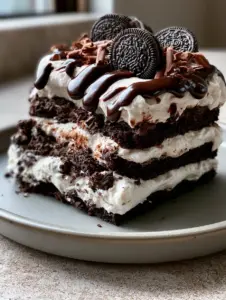
Brookies Cookies represent the absolute pinnacle of confectionery engineering, blending the rich, dense soul of a dark chocolate brownie with the soft, buttery heart of a classic chocolate chip cookie. If you have ever stood in your kitchen torn between two desserts, this handheld masterpiece is the definitive solution to your culinary indecision.
Imagine a warm, freshly baked bar being gently pulled apart, revealing a thick, ultra-fudgy bottom layer with a glossy, crinkly surface that shatters at the touch. The top layer, a soft golden-brown dough, is studded with glistening, half-melted semi-sweet chocolate chunks and finished with delicate flakes of sea salt that catch the light.
This recipe is designed to replicate that exact sensory experience, moving beyond a simple “box mix” approach to create a gourmet dessert with professional-grade textures and flavors. We are going to dive deep into the science of fat-to-sugar ratios and the Maillard reaction to ensure every bite is a perfect balance of salty and sweet.

Why This Fudgy Dark Chocolate and Cookie Dough Hybrid Works
- The Dual-Texture Experience: You get the dense, chewy bite of a dark chocolate brownie base paired with the soft, melt-in-your-mouth crumb of a golden cookie.
- High-Contrast Visuals: The deep ebony of the brownie layer provides a stunning visual foundation for the bright, golden-brown cookie mounds and glistening chocolate chunks.
- Balanced Flavor Profile: By utilizing dark chocolate in the base and semi-sweet chunks on top, we create layers of cocoa complexity finished with a sharp hit of flaky sea salt.
- Scientifically Tested Ratios: This recipe ensures the brownie layer is structurally sound enough to support the cookie top without becoming oily or collapsing.
Essential Components for the Perfect Brookie Bar
To achieve the specific visual of a glossy, crinkly brownie surface, we must focus on the quality of our fats and the aeration of our eggs. Unlike standard chocolate stuffed cookies, the Brookies Cookies require a layered approach that respects the different leavening needs of each dough.
Dutch-Processed Cocoa Powder: 3/4 cup (75g). This provides the “dark chocolate” visual described in the blueprint while offering a smoother, less acidic flavor profile that anchors the dessert.
Unsalted Butter: 1 cup (225g), divided. We use high-quality butter to ensure a rich mouthfeel; melting it for the brownie layer creates that dense, fudgy texture, while creaming it for the cookie layer provides lift.
Granulated Sugar and Light Brown Sugar: A precise mix of 1 1/2 cups (300g) granulated and 1 cup (200g) packed brown sugar. The granulated sugar is essential for the brownie’s crackly top, while the brown sugar provides the “soft golden” moisture for the cookie top.
Semi-Sweet Chocolate Chunks: 1 1/2 cups (255g). Using hand-cut chunks rather than chips ensures those glistening, half-melted pools of chocolate that define a professional-grade dessert.
All-Purpose Flour: 2 1/4 cups (280g) total. This provides the structural framework; we use a lower protein count to keep the crumb tender and prevent a “bread-like” texture.
Flaky Sea Salt: 1 tbsp (15g). These crystals are not just for seasoning; they provide a visual “glisten” and a crunchy textural contrast to the soft dough.
Foundational Leaveners: 1 tsp (5g) baking soda and 1/2 tsp (2.5g) baking powder. These are the “invisible” ingredients required to give the cookie layer its signature soft rise without affecting the brownie’s dense fudge factor.
Professional Tools for Bakery-Style Results
Achieving the look of a rustic, linen-set smartphone photo requires more than just good lighting; it requires the right equipment. A 9×9 inch (23x23cm) square metal baking pan is superior to glass, as it conducts heat more evenly for those sharp, clean edges.
You will also need parchment paper with a generous overhang to act as a “sling,” allowing you to lift the warm bars out for that iconic handheld pull-apart shot. A high-quality whisk is vital for the brownie layer to dissolve the sugar into the eggs, which is the secret to the glossy, crinkly surface.

The Secret to That Irresistible Crinkly Brownie Base
Step 1: Achieving the Deep Dark Cocoa Foundation
Preheat your oven to 350°F (175°C). In a large microwave-safe bowl, melt 1/2 cup (113g) of butter and whisk in the 3/4 cup (75g) of Dutch-processed cocoa while the butter is still hot to “bloom” the chocolate flavor.
Add 1 cup (200g) of granulated sugar and whisk vigorously for two minutes. This specific step dissolves the sugar into the fat, which is the chemical process required to create the thin, glossy, paper-like crust on top of the brownie.
Incorporate 2 large room-temperature eggs and 1 tsp (5ml) of vanilla extract. Fold in 1/2 cup (63g) of all-purpose flour and a pinch of salt until just combined; over-mixing here will lead to a cakey brownie rather than the ultra-fudgy, dense result we want.
Step 2: Crafting the Soft Golden Cookie Top
In a separate bowl, cream the remaining 1/2 cup (112g) of softened butter with 1/2 cup (100g) granulated sugar and 1 cup (200g) brown sugar until light and fluffy. This aeration is what makes the cookie layer “soft” and “golden-brown” in contrast to the brownie base.
Add 1 large egg and another 1 tsp (5ml) of vanilla. Sift in 1 3/4 cups (218g) of flour, the baking soda, and baking powder, mixing until a soft dough forms.
Fold in 1 cup (170g) of the semi-sweet chocolate chunks, saving the remaining 1/2 cup for the very top. If you enjoy a deeper flavor profile, consider comparing this to our brown butter brookies for a nuttier finish.
Step 3: Layering and the Final Bake
Spread the dark chocolate brownie batter evenly into the bottom of your prepared pan. Using a cookie scoop or your hands, drop mounds of the cookie dough over the top, leaving small gaps so the brownie “crinkle” can peek through during the bake.
Press the remaining semi-sweet chocolate chunks into the surface of the cookie dough. Bake for 30-35 minutes; the center should still have a slight jiggle, which ensures the interior remains ultra-fudgy once cooled.
Immediately upon removing from the oven, sprinkle the surface with the delicate flakes of sea salt. This allows the salt to adhere to the glistening, melted chocolate chunks for that perfect visual finish.
Expert Tips for Perfect Textural Contrast
- Temperature Control: Ensure your eggs are at room temperature to create a seamless emulsion, which leads to a smoother, denser brownie crumb.
- The “Jiggle” Test: Do not overbake! The brookies will continue to set as they cool. If the top looks dry and set, they are likely overdone.
- Chunk Placement: For the best visual result, place a few extra chocolate chunks on top of the cookie dough halfway through baking to keep them “glistening” and half-melted.
- Clean Cuts: If you aren’t doing the handheld pull-apart, wait at least 2 hours before slicing with a hot, dry knife for perfectly clean layers.
Storage and Make-Ahead Instructions
Brookies Cookies are remarkably resilient. You can store them in an airtight container at room temperature for up to 4 days, or refrigerate them for a firmer, almost fudge-like texture. If you prefer the “warm, freshly baked” feel from the prompt, simply microwave a square for 10-15 seconds.
For long-term storage, these bars freeze beautifully. Wrap individual squares in plastic wrap and store them in a freezer bag for up to 3 months; this is a great way to always have a gourmet dessert on hand for unexpected guests.
What to Serve With Your Brookies
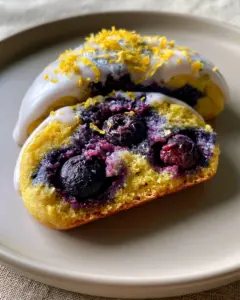
These rich bars pair perfectly with a cold glass of milk, but if you’re looking to build a full dessert spread, consider adding some lighter fruit-based options. The acidity in lemon blueberry cookies provides a refreshing counterpoint to the heavy dark chocolate.
If you’re hosting a themed event like a 4th of July party, these brookies can be decorated with red and white sprinkles to match the festive mood. For a truly decadent experience, serve them warm alongside a scoop of vanilla bean ice cream or even a few cake pops for a variety of textures.
Frequently Asked Questions
Yes, but chunks provide larger, glistening pools of chocolate as seen in the photos. Chunks contain less stabilizers than chips, allowing them to melt more smoothly.
Ensure your brownie batter is thick and dense. Drop the cookie dough in spoonfuls rather than spreading it to maintain distinct, visible layers.
It is recommended for that deep ‘dark chocolate’ visual and a smoother flavor that balances the sweetness of the cookie top layer.
The glossy, crinkly top is caused by dissolving granulated sugar into the eggs. Be sure to whisk the sugar, melted butter, and eggs for at least two minutes before adding flour.
The Ultimate Brookies Cookies Recipe


Brookies Cookies: The Ultimate Fudgy Dark Chocolate and Sea Salt Hybrid
Ingredients
Equipment
Method
- Whisk melted butter and cocoa powder until smooth to bloom the chocolate flavors.
- Vigorously whisk in sugar and eggs for two minutes until the batter is glossy, ensuring a crinkly top.
- Gently fold in the flour until just combined to maintain a dense, fudgy texture.
- Cream softened butter and sugars until light and fluffy for a soft golden crumb.
- Add egg and vanilla, then sift in flour, baking soda, and powder. Fold in 1 cup of chocolate chunks.
- Spread brownie batter in pan, then drop spoonfuls of cookie dough on top, leaving small gaps.
- Bake at 350°F (175°C) for 30-35 minutes until the center has a slight jiggle.
- Immediately sprinkle with flaky sea salt while chocolate chunks are still glistening.
Notes
Use Dutch-processed cocoa for the darkest, most intense chocolate color.
Master the Art of the Hybrid Dessert
The beauty of the Brookies Cookies lies in their ability to satisfy every craving in a single bite. From the ultra-fudgy brownie base to the soft, golden-brown cookie top and that final hit of sea salt, this is a recipe that looks just as good as it tastes.
I would love to see your results! If you make these, please leave a comment below and share your photos with me on Pinterest. Don’t forget to sign up for our newsletter for more gourmet baking secrets delivered straight to your inbox.